Looking to master WordPress theme development? As a beginner, getting familiar with template parts is an essential starting point.
Template parts in WordPress are modular code components that let you break down reusable sections, such as headers or footers, which you can use across various templates. They streamline your workflow, reduce duplicate efforts, and rapidly build professional WordPress websites.
In this guide, we’ll discuss what template parts are, why they matter, and how to implement them for simplified theming. Let’s get started!
WordPress Templates - A Quick Overview
Before diving into how to build templates and template parts, let's first cover some basics.
In this quick overview, we'll discuss what exactly templates and template parts are and how they function behind the scenes in WordPress. This will provide some useful context before we get into the details of putting them together.
What is a WordPress Template?
A WordPress template is a file that controls how your site's content is displayed. They take your dynamic content from the database and wrap it with HTML markup so that it can be displayed properly in a browser.
For example, a basic WordPress template may contain the site header, opening tags for the main content, a loop to display blog posts, and the footer. When a visitor loads a page, WordPress would pull the latest posts from the database and combine it with the template markup to generate the full HTML page.
Now, you might wonder - what’s the difference between a WordPress template and plain HTML?
HTML is simply a language that tells your browser how to display static content. That’s it.
To showcase content that changes and adapts, like featured products or recent blog posts, websites need a way to pull that data in dynamically. With templates, it can be easily done. You don’t have to hard-code everything.
For example, to display your site's title in HTML, you would manually type the text:
<h1>My Website</h1>But in a WordPress template, you can use a template tag like this:
<h1><?php bloginfo('name'); ?></h1>This will pull the name from the database. If you change the name in your WordPress admin, it will update everywhere that template tag is used.
How do WordPress Templates Work?
Templates act as the presentation layer that works behind the scenes to display your WordPress site to visitors.
Let's say you’ve built a website with WordPress. When a visitor navigates to a page like your blog or an ‘About Us’ page, WordPress looks at the URL and determines what kind of page it is. It then searches through a pre-defined template hierarchy (more about this later) to find the best matching template file for that page type.
For example, if it's a single blog post, it may load ‘single.php’. If it's a tag page, it may load ‘tag.php’. Once WordPress locates the right template, it parses a block markup code and outputs the final HTML sent to the visitor's browser.
Note: A block markup uses a special HTML syntax, an opening <!-- and closing /-->, which tells WordPress to parse the code between as a block rather than a normal HTML comment.
By wrapping your dynamic content with an HTML structure, you can change the look and layout of your site by simply editing template files. You don’t need to modify the underlying content.
WordPress Templates vs. Template Parts
So, we’ve already talked about templates. But what about template parts - what exactly are they?
If you’ve been using WordPress for a while, you’ve probably heard about them a lot.
You can think of templates as the top-level files that control the overall HTML structure of a page. Template parts, on the other hand, are smaller, reusable sections that can be included in templates.
For example, ‘header.php’ may contain the branding and navigation menu for your site. This header part can then be added to templates like ‘home.php’, ‘page.php’, etc. Footers, sidebars, and entry content are also commonly template parts.
The benefit of parts is they follow the ‘Don't Repeat Yourself’ principle in coding. This means repeatable sections are separated into different files so you only need to update the code once. Doing so will keep your templates clean and modular.
What Are Block Theme Templates?
Block theme templates enable full site editing with blocks. You can change page layouts, typography, colors, and other design elements directly within the block editor.
Here's a simple example of a block theme template for a single post:
<!-- wp:template-part {"slug":"header","tagName":"header","className":"site-header"} /-->
<!-- wp:post-title {"isLink":true,"className":"post-title"} /-->
<!-- wp:post-date {"className":"post-date"} /-->
<!-- wp:post-content {"className":"post-content"} /-->
<!-- wp:post-tags {"className":"post-tags"} /-->
<!-- wp:template-part {"slug":"footer","tagName":"footer","className":"site-footer"} /→
As you might notice, a block theme template is composed entirely of block markup code. This allows WordPress to translate the code into final HTML that is rendered in the browser.
One thing to keep in mind, though, is that block themes work differently from classic themes.
With a block theme, you can visually customize things like your header and footer using blocks right in the editor. You don't need to edit PHP files. Plus, they’re typically faster.
But with a classic theme, you typically have to modify PHP template files like ‘header.php’ to change the header design. They give you less control over the full site design in the editor itself. You may only be able to use blocks for your content, not site-wide elements.
Note: Block theme templates must be located in the ‘/templates’ folder within your theme. It should have at least an ‘index.html’ so WordPress can identify the theme as a block theme. You can then add other templates like ‘header.html’, ‘footer.html’, and ‘page.html.’ These template files contain the blocks and markup to define each page's structure and design.
How Template Hierarchy in WordPress Works
Now, let's talk about how the template hierarchy works in WordPress.
Whenever you visit a page on a WordPress site, it uses a query string to determine the proper template to display the page.
With this info, WordPress follows a predefined template hierarchy to find the perfect matching template file to load and display the page.
This system gives you great flexibility when building a custom theme. You can create tailored templates for unique pages, knowing WordPress will be able to find and load them. And if a template is missing, the defaults act as handy fallbacks.
You can check this visual diagram, courtesy of WordPress.org, to understand the template hierarchy system.
The template hierarchy in WordPress is queried based on the type of page:
- Front page hierarchy
- Home hierarchy
- Singular hierarchy
- Archive hierarchy
- Search hierarchy
- 404 hierarchy
- Embed hierarchy
If you are creating your own WordPress theme, understanding the template hierarchy above is really helpful.
The template hierarchy shows you which template files you need to add for your custom theme. Knowing which ones to create allows your theme to work properly and display all the right parts of a WordPress site.
To understand WordPress’s template hierarchy by query type, we highly recommend you visit this documentation from WordPress.org.
How to Build Templates in WordPress
1) Getting Familiar with the Visual Editors
Before making templates, get to know WordPress's visual editors like the Site Editor and Template Editor. These let you visually design and tweak your site's layout without coding. Check WordPress's docs for help on using them.
2) Finding and Editing Existing Templates
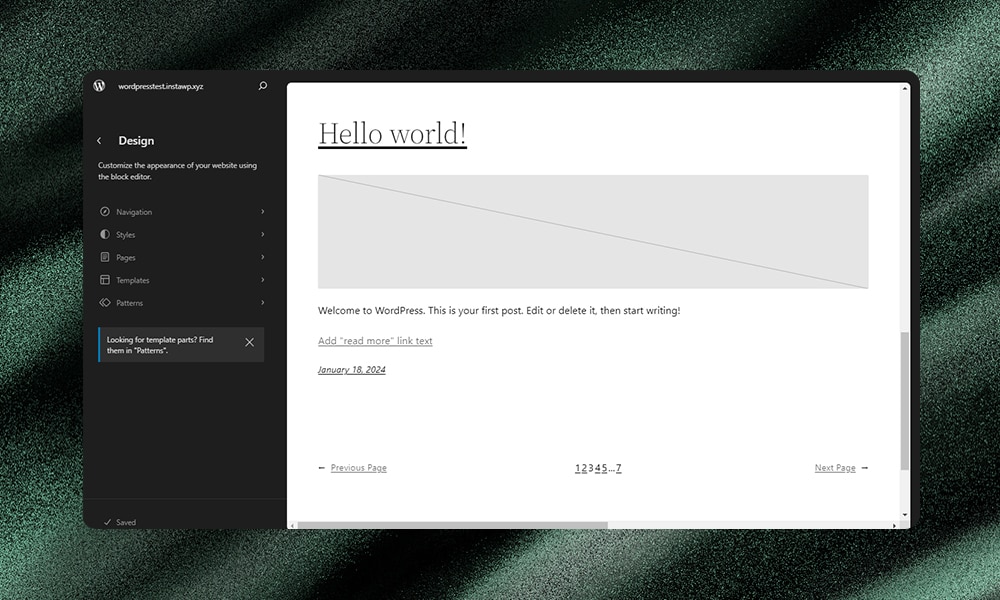
First off, make sure your current theme supports Full Site Editing. Basic themes such as Twenty Twenty-Two and other block-based themes are examples.
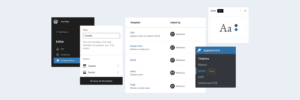
To edit templates, go to the WordPress admin and click ‘Appearance > Editor.’ Click ‘Templates’ to see templates from your themes, plugins, and custom work. Edit these templates visually by adjusting blocks.

Note: Changes made in the editor are saved to the database which overrides any theme files. If distributing a theme, make sure to move customizations to the ‘/templates’ folder so they stay with the theme.
3) Adding New Templates
Go to Templates > Manage all templates and click ‘Add New Template.’ Here, you can design a custom template with blocks.
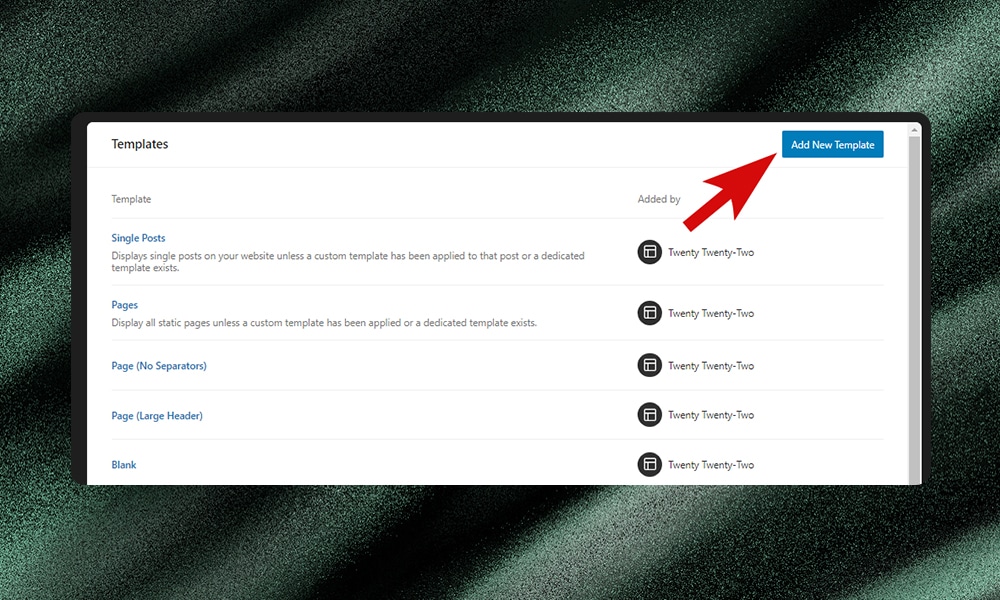
Remember, new templates go into the database. To package them with a theme, copy the markup into the ‘/templates’ folder and name them accordingly.
4) Using Custom Templates
Custom templates allow unique designs for individual posts/pages. Pick them in the post editor's Template setting.
For the block editor (Gutenberg) and WordPress to know that your theme works with the Site Editor, you need to add an index.html file inside the ‘/templates’ folder.
Your theme files should look like this:
my-theme/ index.php style.css templates/ index.htmlThis establishes the foundation. Then you can further customize templates within your theme.
5) Adding Templates to the JSON File
Finally, add your custom templates in ‘theme.json’ so they'll work properly when the theme is installed. Here, you can specify the attributes like the width and alignments. Make sure that the file is added to your root folder.
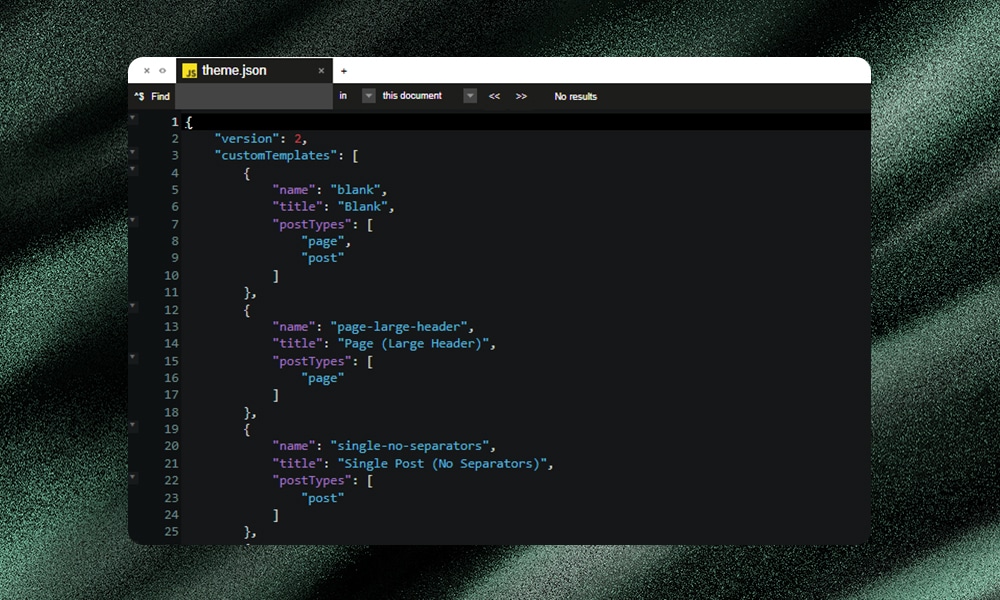
Check this Theme JSON guide in WordPress to learn more about JSON files.
How to Build Template Parts in WordPress
1) Understanding Template Parts
Template parts are modular sections like headers, footers, and sidebars which you can reuse across your WordPress site's templates.
These reusable code blocks offer several advantages.
First, they make it easier to organize codes because related elements are compartmentalized into their own files instead of one lengthy template.
Editing is simplified too. You only need to make a change in one part file instead of editing multiple templates.
2) Learning How to Use the Template Part Block
To include a template part on a page, use the Template Part block in WordPress. In this block, put in a slug, which is like a nickname, for the part file you want to add. This slug needs to match the filename of the part inside your theme's ‘/parts’ folder.
Here’s the block markup to use to add a template part in a template:
<!-- wp:template-part {"slug":"your-template-part-slug"} /-->The code above tells WordPress to get a certain reusable part and include it. The magic lies in that little slug name which links to the right file for showcasing.
For example, you can load header and footer parts with the following markup in your template:
<!-- wp:template-part {"slug":"header","tagName":"header"} /-->
<!-- wp:template-part {"slug":"footer","tagName":"footer"} /-->
Note: The tagName attribute designates the HTML tag wrapping the template part.
3) Organizing Your Template Parts
Organize your template parts by placing them in the ‘/parts’ folder of your theme. Here, you can add your files like ‘comments.html,’ ‘footer.html,’ and ‘header.html.’
Note: When organizing template parts, save them directly inside your theme's ‘/parts’ folder. Don't create additional subfolders inside of ‘/parts’ so that WordPress can easily locate your files.
4) Build and Edit Template Parts in the Editor
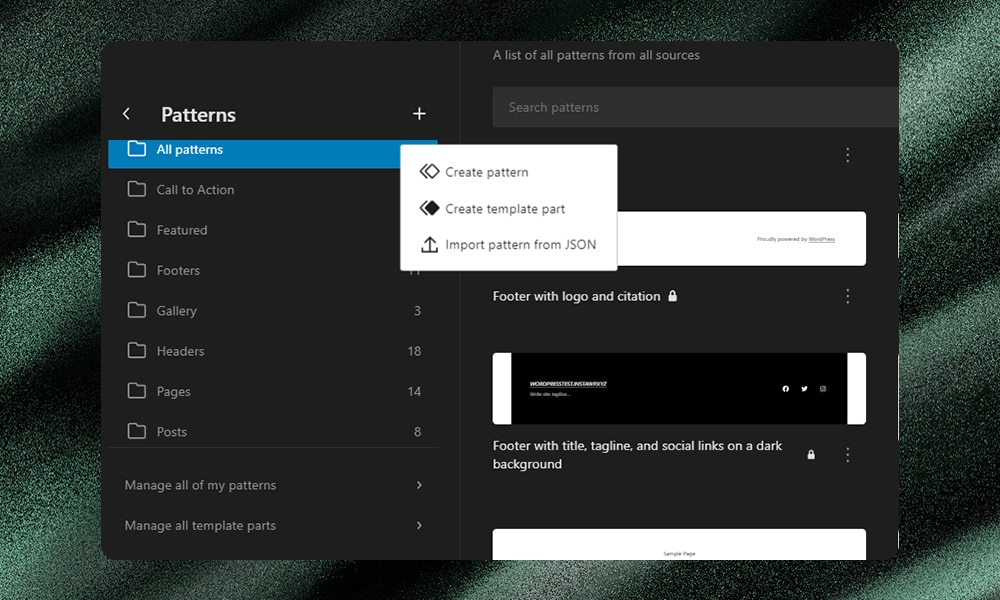
Access and edit your template parts via Appearance > Editor in the WordPress admin. Navigate to the Template Parts section under Patterns to customize or review your parts.
Remember, changes made here are saved to the database and should be migrated to the ‘/parts’ folder for theme distribution.
After finalizing your designs in the editor, transfer the block markup to the appropriate files within the ‘/parts’ directory.
5) Add New Template Parts When Needed
To add a new template part, click the + icon next to the Patterns heading and follow the prompts. After creating it in the editor, ensure to add a corresponding file to the ‘/parts’ folder of your theme, including the block markup you designed.
6) Register Your Template Parts
Register your template parts in the theme.json file. This process helps label them appropriately and ensures they are available for use within the Site and Template editors.
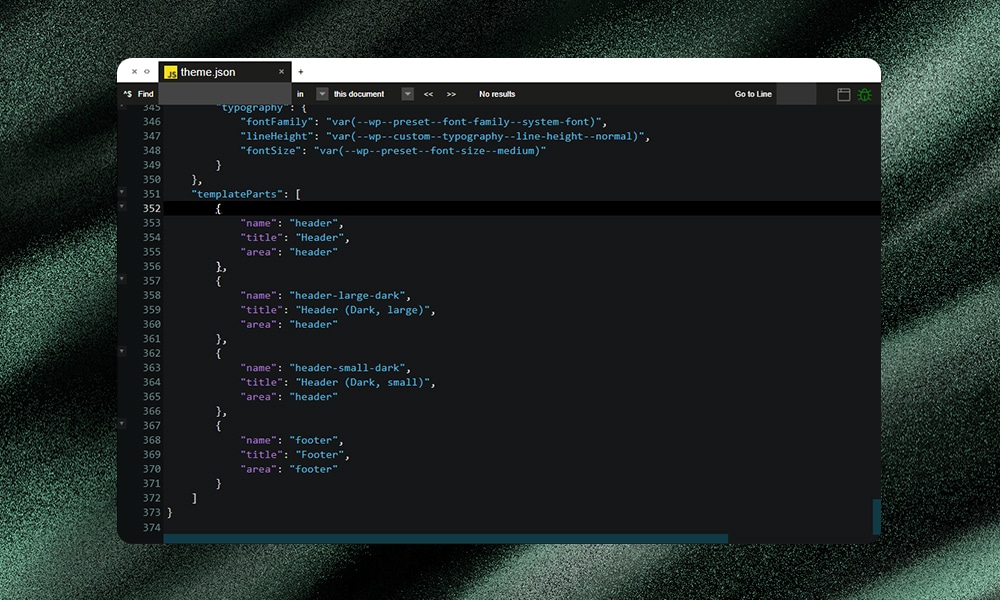
Don’t forget to organize your template parts into areas within the editor. WordPress, by default, allows you to register templates in these areas: uncategorized (general), header, and footer.
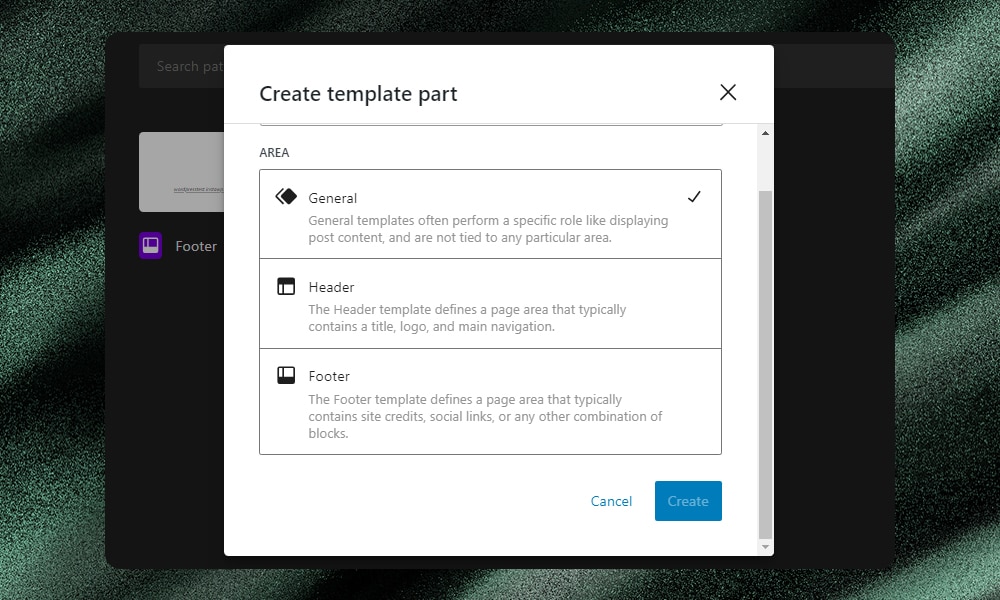
For unique theme requirements, you may register custom areas to expand your organizational structure. You may register a custom area by adding a filter to the ‘default_wp_template_part_areas’ hook.
For example, if you want to add a custom template part area for a ‘Featured Content’ section in your WordPress theme, you just have to add the following code to the theme’s ‘function.php’ file:
add_filter( 'default_wp_template_part_areas', 'mytheme_register_featured_content_area' );

function mytheme_register_featured_content_area( array $areas ) {
    $areas[] = array(
        'area'        => 'featured-content',
        'area_tag'    => 'section',
        'label'       => __( 'Featured Content', 'mytheme' ),
        'description' => __( 'Sections for featured content used across the site.', 'mytheme' ),
        'icon'        => 'star-filled'
    );

    return $areas;
}
Wrapping It Up
There you have it - a basic intro to WordPress templates and template parts!
With template parts, you can use modular code components across your site by following the ‘Don't Repeat Yourself’ principle.
Master these new skills by customizing your WordPress site and adding unique functionalities or designs. Begin with simple tasks and work your way up to more challenging features. The possibilities are endless!
