


Have you ever updated your WordPress site only to find the changes aren't showing up? Or, perhaps, your website takes so long to load when viewed on the front end?
The issue could be in your site’s cache, a temporary storage of data that, while speeding up your site, can sometimes hold onto outdated information.
If you're facing this issue, it's likely time to clear your WordPress cache.
There are several ways to clear your site’s cache - using a caching plugin, through your browser, directly on the web server, or via an FTP client. Let's delve into each of these approaches to find the best fit for your needs.
How is a WordPress Site Cached?
Site caching is like having a temporary storage of your website files.
Imagine this - you have a favorite book that you read often. Instead of searching for it in the library every time, you keep it on your desk for quick access. Caching works similarly for websites.
When a user visits a website, the server needs to go through several steps to process requests and fetch data in order to display the page. This can take a lot of time, especially for complex sites.
Caching stores some of your site’s files (like pages or images) in a temporary storage area. So, the next time a visitor visits your site, it loads faster because it only needs to retrieve these saved files, hence, skipping many of the time-consuming steps. This process can greatly improve a website’s performance which can lead to more traffic and better conversion rates.
Now, WordPress is no different from any other site - it’s also made up of several files like HTML pages. When caching is applied, these dynamically generated HTML files are stored and served each time a request is made. So, instead of processing heavier scripts every time a user visits the site, the web server only needs to load the stored files.
According to WordPress’s Developer Resources, caching can be done in several ways:
- Caching Plugins: Caching plugins create static files of your WordPress posts and pages. These files are served to users to reduce the server's processing load and improve performance for static pages. Examples of WordPress caching plugins are WP Super Cache, W3 Total Cache, and Cache Enabler.
- Browser Caching: Browser caching improves a site’s performance by reducing the number of requests for each page. Browsers store the static assets of a site on the visitor’s computer and load them whenever the user visits the same page again. This way, only files that have been changed are loaded, hence reducing page load times.
- Object Caching: Object caching works by transferring data from slow retrieval sources to faster ones. It makes data access easier and ensures cached data is replaceable and regenerable. Examples of object caching engines used are Redis, Memcached, and APC.
- Server Caching: Server caching, compared to the other techniques above, is the most complex option. It can start with local caching on the server and extend to using multiple caching servers (known as reverse proxy servers). Developers often implement an opcode cache like Opcache or Varnish cache, (together with a WordPress caching plugin) to make web server caching more effective.
4 Ways to Clear WordPress Cache
Caching boosts your website's speed and efficiency, but it's not a set-and-forget solution.
Clearing your WordPress cache periodically is equally important. Otherwise, it can cause an array of issues such as bloated data, display of outdated content, functional glitches or conflicts with new themes or plugins, and slower page load times. All of these can negatively impact your site’s SEO and user experience.
There are several ways to clear the cache of your site, and we’ve laid out below the easy steps you can follow to keep your site running smoothly.
1) Clear Your Browser Cache
If your WordPress site seems not to display the changes or load properly, then you might need to clear your browser cache. By doing so, you can view the most current version of your site instead of the stored, outdated one.
We’re going to use Chrome to demonstrate this method. But note that these same steps should work with most browsers as well.
Start by launching the web browser you use to access your WordPress site. Then, click on the menu icon in your browser. In Chrome, this is located in the upper right corner and looks like three little dots.
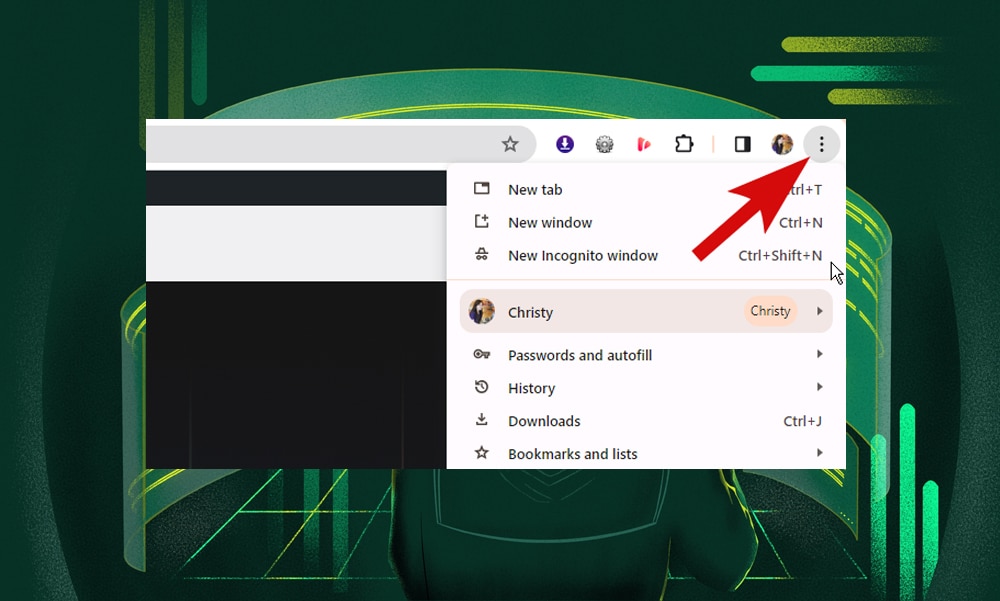
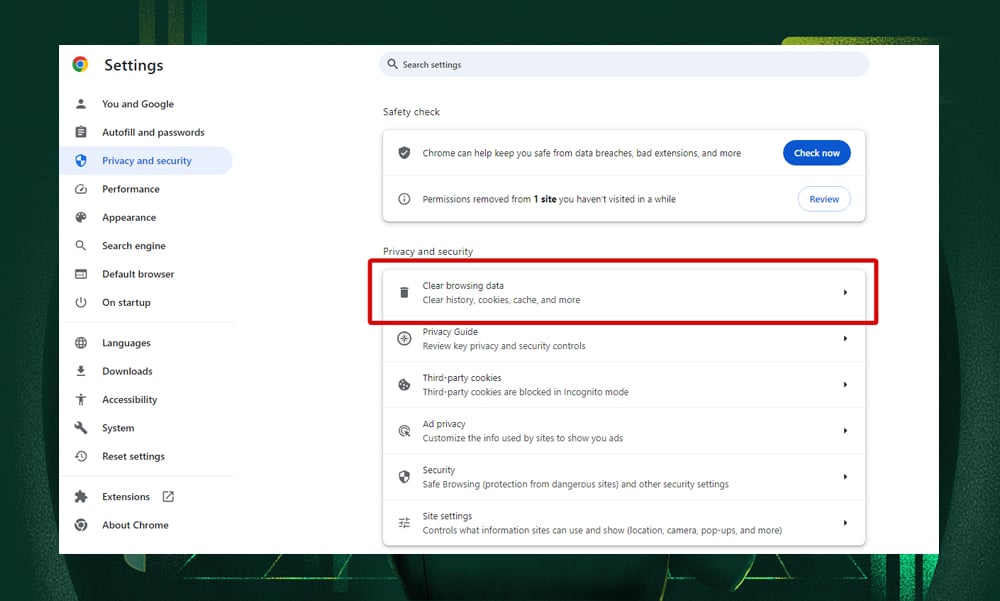
From the dropdown menu, select ‘Settings.’ Then, in the Settings menu, scroll down to the ‘Privacy and Security’ section.
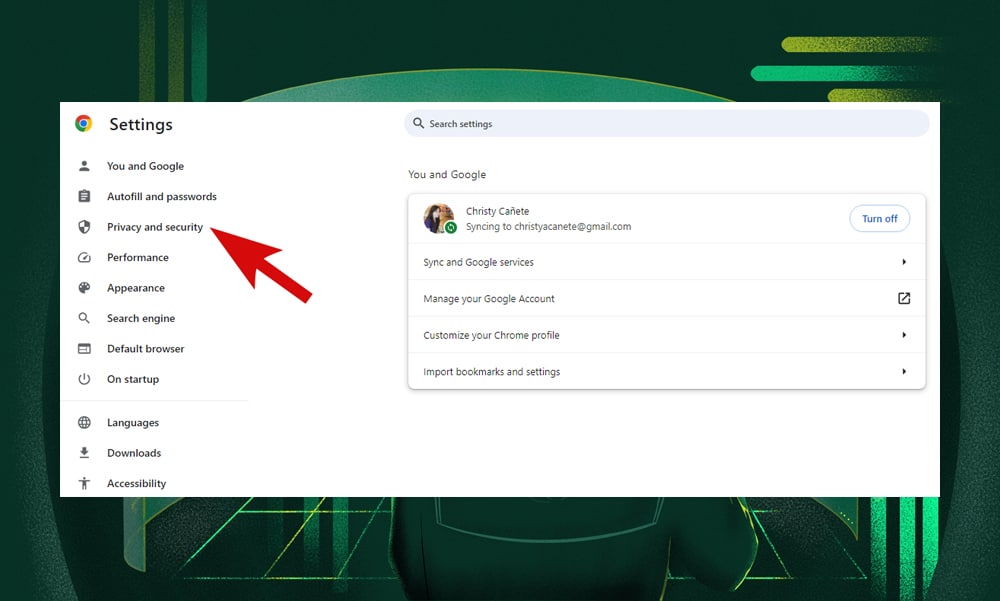
Next, click on ‘Clear browsing data.’ This will open a new tab with different options.
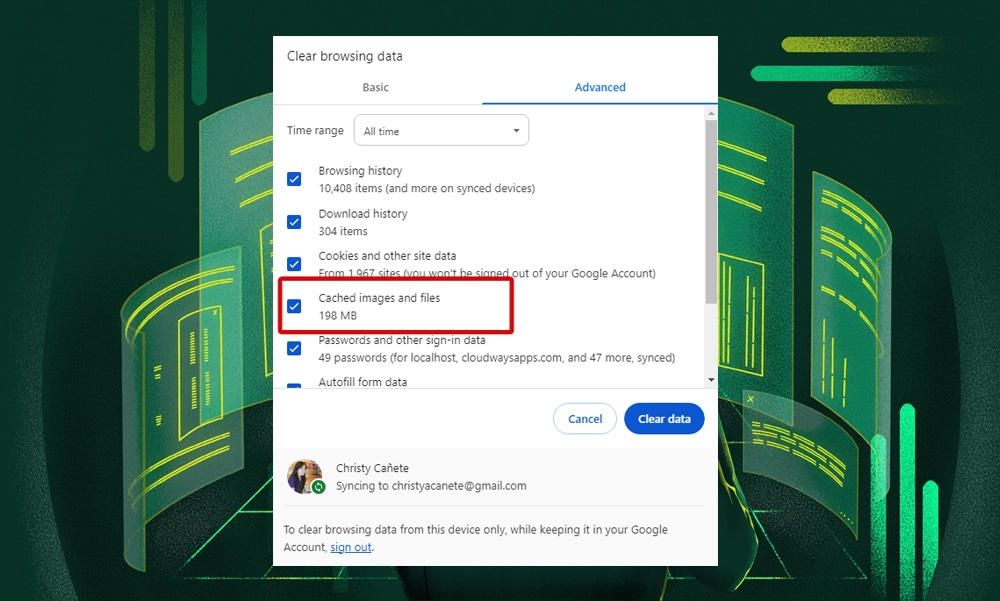
In the ‘Clear browsing data’ window, go to the ‘Advanced’ tab and then select 'Cached images and files.' From here, you can also uncheck other options if you only want to clear the cache.
Once everything is set, click on the ‘Clear data’ button. That’s it!
2) Clear Cache Using WordPress Plugins
Using WordPress caching plugins is the easiest way to manage your site's performance by automating the caching process. They’re particularly useful in keeping your site’s content updated and maintaining optimal site speed.
There are many great WordPress caching plugins in the market, and some of our favorites are WP Rocket, Nitropack, WP-Optimize, and LiteSpeed Cache.
For this tutorial, we'll be using LiteSpeed Cache.
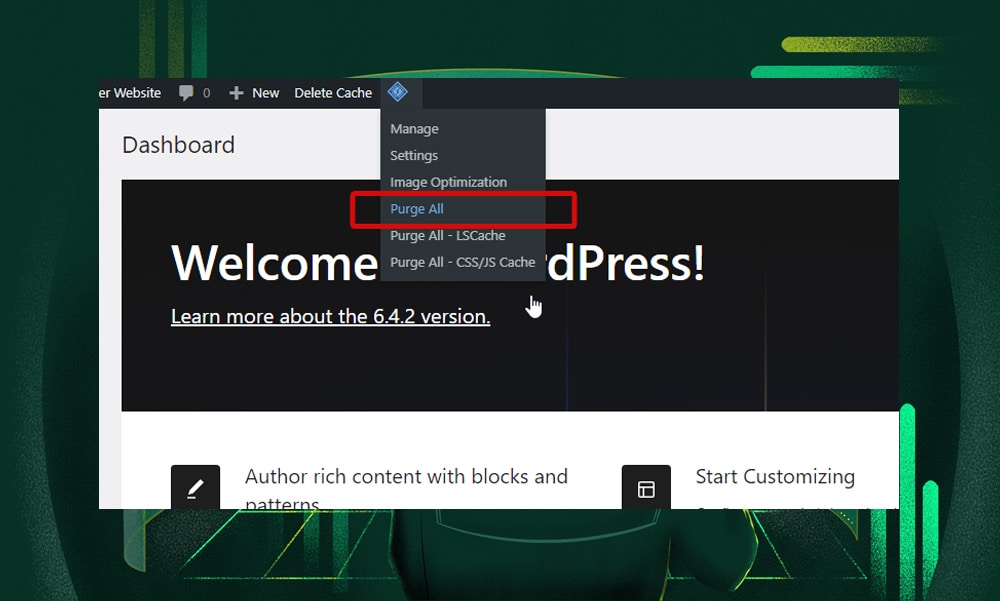
First, log in to your WordPress dashboard. Then look for the LiteSpeed Cache icon on top of the page (make sure it’s installed on your WordPress site). Hover your mouse over the icon to see the dropdown menu.
Here, you'll find an option 'Purge All.’ Click this to clear all the cached content stored by LiteSpeed Cache.
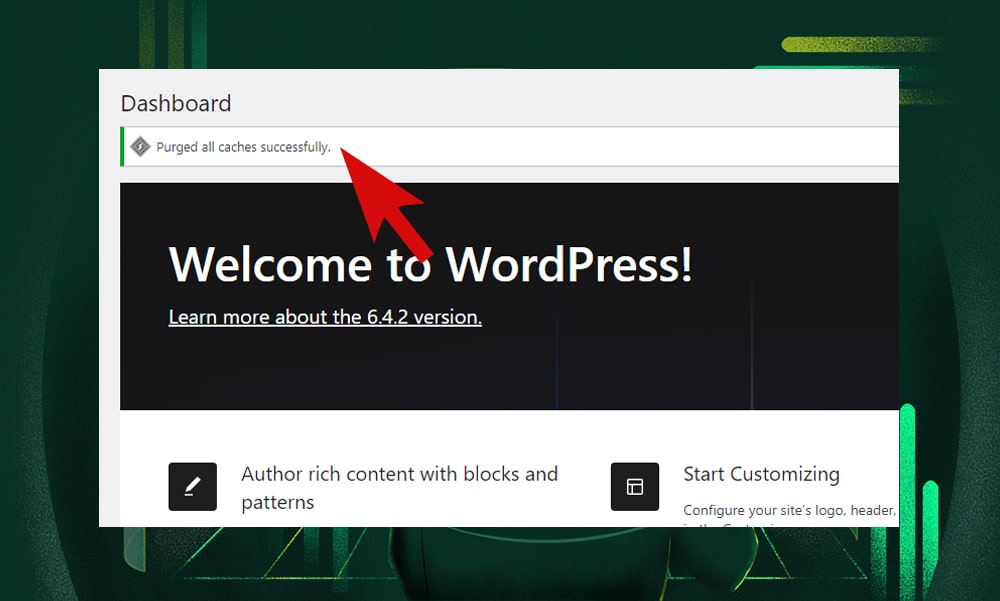
Once it’s finished, you should see a success message at the top.
3) Clear Server-Side Cache
If you’ve made changes to your WordPress site but can’t seem to see them reflected, it might be time to clear your server-side cache.
Unlike browser cache or caching plugins, server-side cache operates at the web server level. It handles requests before they reach WordPress. This type of caching is a bit more complex, too, compared to caching plugins. However, they tend to be very efficient at handling requests, making them a great choice for managing high-traffic websites.
Server-level caching might use applications like reverse proxies, CDN (Content Delivery Network) cache, database caching, and Opcode caching.
That said, it’s important to clear the server-side cache every now and then to ensure that your latest updates are visible and that your site performs at its best.
Here are the steps to clear server-side cache:
First, log in to the cpanel provided by your web hosting service. For our demonstration, we’ll be using Namecheap’s hosting cpanel.
Now, you need to find the cache management tools on your cpanel. Most web hosting services offer various built-in caching solutions.
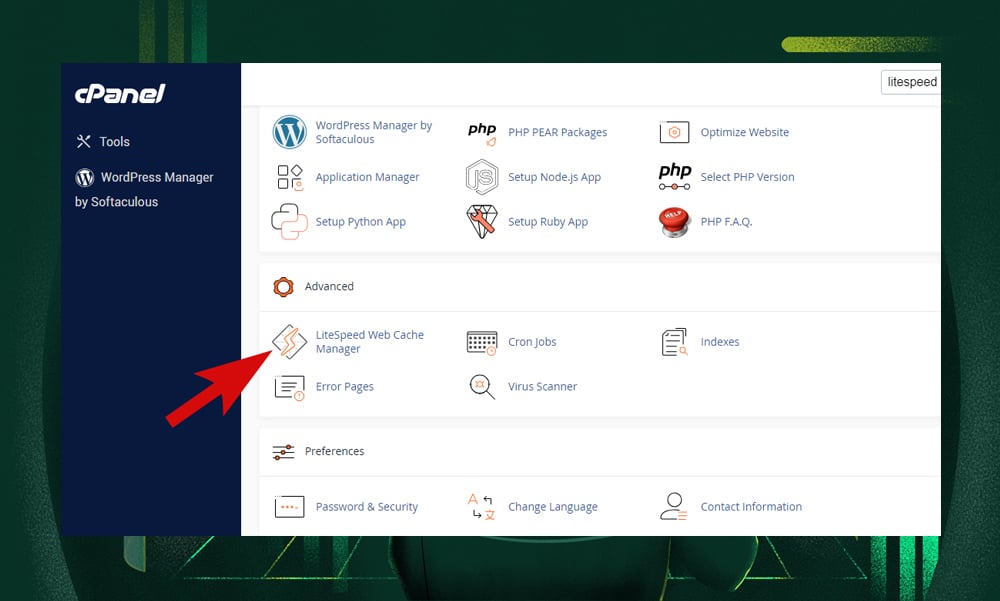
In Namecheap, we’ll be using LiteSpeed Web Cache Manager. You can find this tool under the ‘Advanced’ section. Alternatively, you can use the search bar on the top-right and type in the keyword ‘cache.’
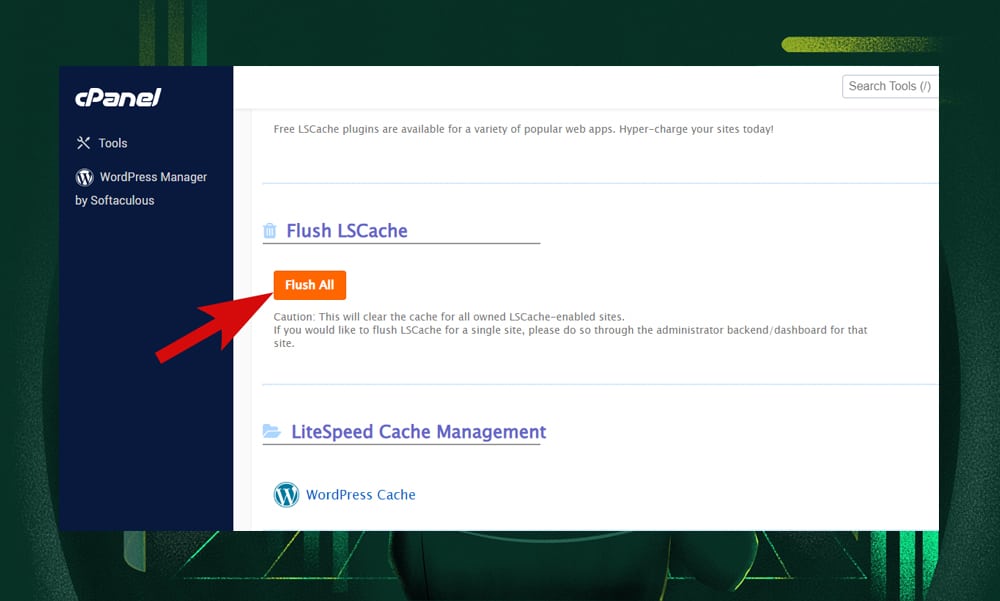
Once you’ve opened LiteSpeed, you’ll need to look for the option ‘Flush All’ (in some caching tools, this might be labeled as ‘Purge Cache’ or ‘Clear Cache’). Click it to delete all the cached content stored on the server.
Note: If you're using a CDN with Namecheap hosting, you might need to clear the CDN cache separately. Check this article about Supersonic CDN from Namecheap to learn more.
4) Clear Cache Manually via FTP
If the other methods above are not effective or available, then you can manually clear your WordPress cache through FTP. This is also applicable if you're troubleshooting specific issues that require a more granular level of cache management.
To start, you will need to install an FTP client on your computer. In this tutorial, we’ll be using FileZilla.
You’ll also need the FTP credentials provided by your web hosting service. This can be found in the FTP manager section of your cpanel.
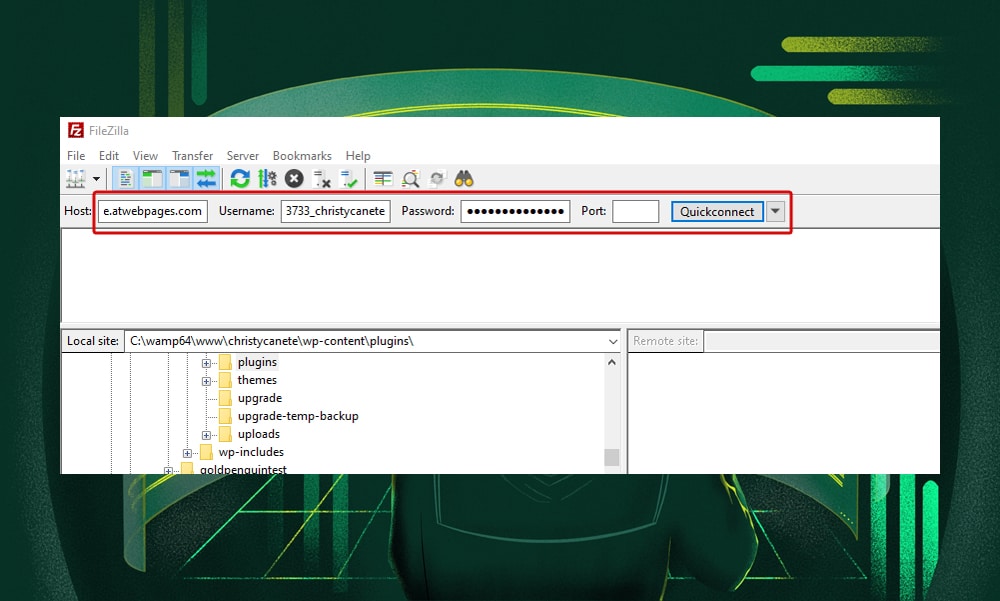
Now, open FileZilla and enter your FTP credentials to connect.
Once connected, navigate to the root directory of your WordPress installation. Look for the 'wp-content' folder.

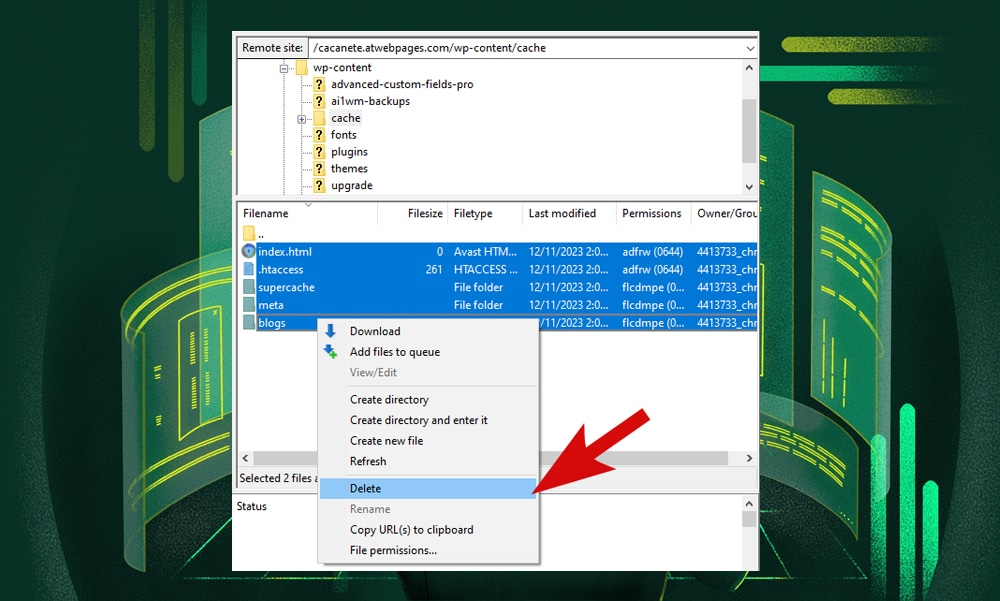
Then, inside the 'wp-content' folder, look for the cache folder.
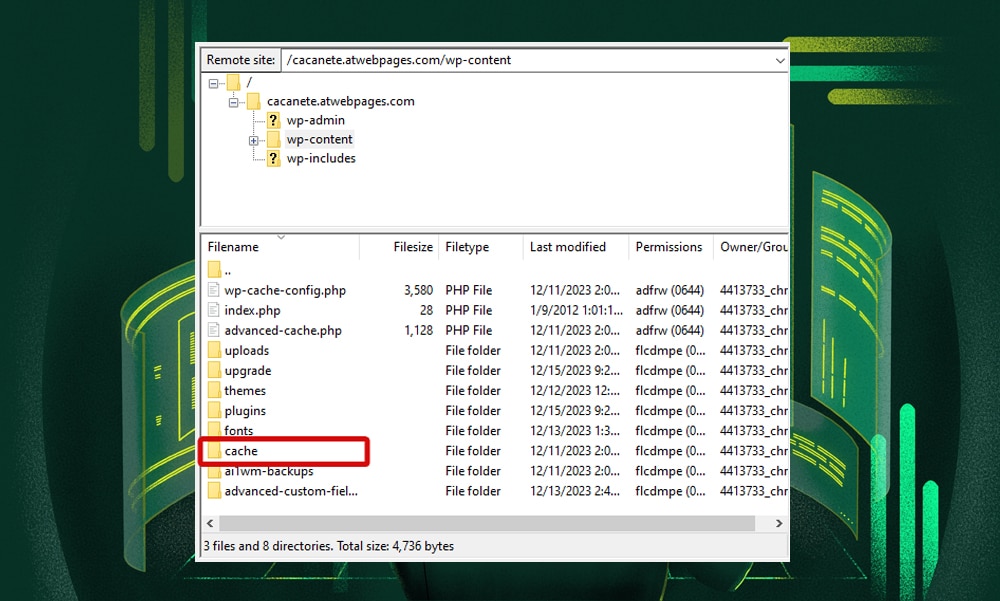
Open the cache folder, right-click on the files you want to delete, and select 'Delete.' Be cautious not to delete the folder itself, just the files and subfolders inside it. This action should now clear the cached data stored by your WordPress site.
How to Clear WordPress Cache - FAQs
Where is the cache stored in WordPress?
In WordPress, a cache is usually stored in the 'wp-content/cache' directory of your website's root folder. However, if you’re using caching plugins, this might be found in other directories within the ‘wp-content’ folder.
How do I manage cache in WordPress?
To manage cache in WordPress, you can use caching plugins. You can also clear the cache on the browser, via your hosting cpanel, or manually via FTP.
How do I clear my cache on WordPress for free?
To clear your WordPress cache for free, you can clear your browser cache or manually delete cache files via FTP if your website setup allows it. You can also use the free versions of caching plugins like WP Super Cache or W3 Total Cache.
Is it safe to delete WP content cache?
Yes, it is safe to delete the WP content cache since it won’t affect your website's core files or data. It simply removes the stored content to ensure your site displays the most current version.
That’s a Wrap!
The importance of regularly clearing your WordPress cache cannot be overstated. This maintenance step is critical to avoid issues like slow page loading speed, outdated content, and technical glitches.
If the methods we've covered don't solve your problems, then you should contact your web hosting’s technical support team for further assistance.
Lastly, before you clear the cache, always remember to back up your site. This way, you can quickly revert it back if any issue arises.