

There are several reasons why you might need to add code snippets to your WordPress site.
Perhaps, you're tackling a WordPress error or vulnerability. Or, you might have a specific requirement that no existing theme or plugin seems to meet.
In any case, code snippets can be a practical solution without the weight of additional plugins which, in excess, can slow down your site.
In this article, we’ve compiled a list of the best code snippets for WordPress. Whether you’re looking to improve your site’s user experience or integrate some cool new features, these snippets have got you covered. Plus, they’re easy to implement, even if you’re not a coding expert.
In a hurry? Here's an overview of our best code snippets for WordPress:
- Contact Form 7 Spam Protection
- Success Page Redirects
- Add a PayPal Donation Button
- Add the Current Year in Blog Posts
- Replace the “Howdy” Message on the Admin Bar
- Add a Custom Dashboard Logo
- Add Your Own 404 Error Message
- Limit WordPress Post Revisions
- Display Both Publication and Modified Dates on Posts
- Set Your Website to Maintenance Mode
- Customize the Footer Text in Your WP Admin
- Hide WordPress Update Message
- Insert Text Under Every Blog Post
- Create a Custom Post Type
Tips Before Adding Code Snippets on WordPress
WordPress’s open-source nature gives you the freedom to tweak existing themes or functionalities with custom codes. Unfortunately, it only takes one single mistake to make your site inaccessible.
Before adding your code snippets, keep these essential tips in mind:
- Always start with a complete backup of your WordPress site before adding new code. That way, you can quickly restore your content if anything goes wrong.
- Don’t just copy and paste code snippets. Take time to understand what each snippet does. This knowledge helps prevent potential conflicts and errors.
- It’s a good practice to use a child theme when you're adding code to your theme's files. This prevents your customizations from being overwritten when the parent theme updates.
- If possible, test your new code snippets in a staging environment first. This would allow you to identify and fix issues right away without affecting your live site.
List of Best Code Snippets for WordPress
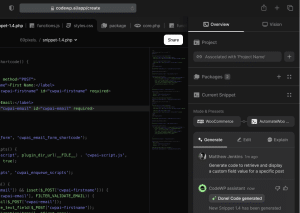
Here’s a rundown of the best code snippets for WordPress which we’ve generated using the CodeWP platform.
Note: We’ve tested these snippets on different WordPress themes like Cube Blog, Twenty Twenty-One, Twenty Twenty-Two, and Twenty Twenty-Three. However, some of them might not work correctly on certain themes. Make sure that you understand how each snippet works and modify them as needed to fit your needs.
1) Contact Form 7 Spam Protection
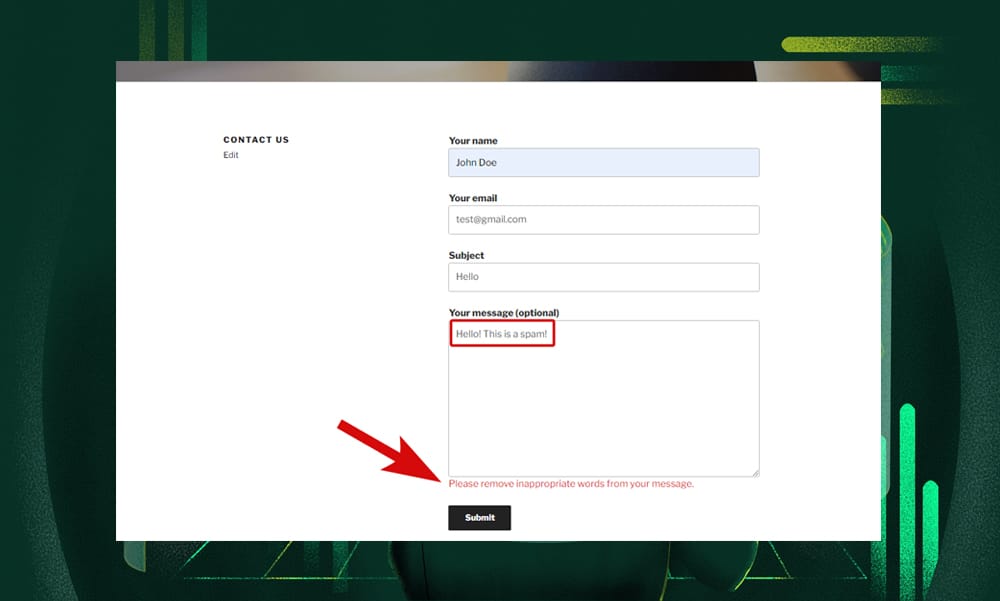
Spam messages are a prevalent issue in Contact Form 7. They flood your inbox with irrelevant content, compromise security, and potentially damage the credibility of your business. One of the simplest ways to combat this is to add a PHP validation code.
The code snippet below effectively blocks any form submission that includes the defined "spam" words in the "your-message" text area field. If you need to add or remove words from the spam list, you can simply update the $spam_words array.
// Add action hook
add_action('wpcf7_validate_textarea', 'custom_textarea_validation_filter', 10, 2);

function custom_textarea_validation_filter($result, $tag) {
    // Get the form input
    $form_input = $_POST[$tag->name];

    // Define spam words
    $spam_words = array('spam', 'viagra', 'cialis', 'xanax', 'loan', 'credit', 'claim', 'won', 'selected', 'congratulations');

    // Check if any spam word exists in the input
    foreach($spam_words as $spam_word) {
        if(stripos($form_input, $spam_word) !== false) {
            // Add validation error
            $result->invalidate($tag, 'Please remove inappropriate words from your message.');
            break;
        }
    }
    return $result;
}
2) Success Page Redirects
Sometimes, you might want to redirect users to another page after they submit a form, like a thank you page.
The code snippet below, used with Contact Form 7, does exactly that.
It’s easy to implement and ensures your website feels more responsive and thoughtful. It uses JavaScript to redirect the user to a specified URL after submitting a Contact Form 7 form.
function cf7_redirect() {
    ?>
    <script type="text/javascript">
    document.addEventListener( 'wpcf7mailsent', function( event ) {
        location = 'https://your-redirection-url.com'; //replace with your URL
    }, false );
    </script>
    <?php
}
add_action('wp_footer', 'cf7_redirect');
3) Add a PayPal Donation Button
Want to easily accept donations on your WordPress site? This code snippet is perfect. Just add the [paypal_donation] shortcode at the desired location within your content and you've got a PayPal donation button ready to go.
The PHP code below defines a WordPress shortcode [paypal_donation] which outputs a PayPal donation form when used in the post editor or any text widget. The shortcode accepts three attributes: business, amount, and currency_code. Make sure to customize these attributes according to your preferences
Note: If you encounter the error message “This organization doesn't accept donations through this link” after clicking the donation button, you can follow these steps to resolve the error.
function paypal_donation_shortcode($atts) {
    // Extract the attributes
    $atts = shortcode_atts(
        array(
            'business' => 'your-paypal-email@example.com',
            'amount' => '0',
            'currency_code' => 'USD',
        ),
        $atts,
        'paypal_donation'
    );
    // Build the HTML form string
    $output = '<form action="https://www.paypal.com/cgi-bin/webscr" method="post" target="_top">
        <input type="hidden" name="cmd" value="_donations" />
        <input type="hidden" name="business" value="' . esc_html($atts['business']) . '" />
        <input type="hidden" name="amount" value="' . esc_html($atts['amount']) . '" />
        <input type="hidden" name="currency_code" value="' . esc_html($atts['currency_code']) . '" />
        <input type="submit" value="Donate" />
    </form>';
    // Return the HTML form
    return $output;
}
add_shortcode('paypal_donation', 'paypal_donation_shortcode');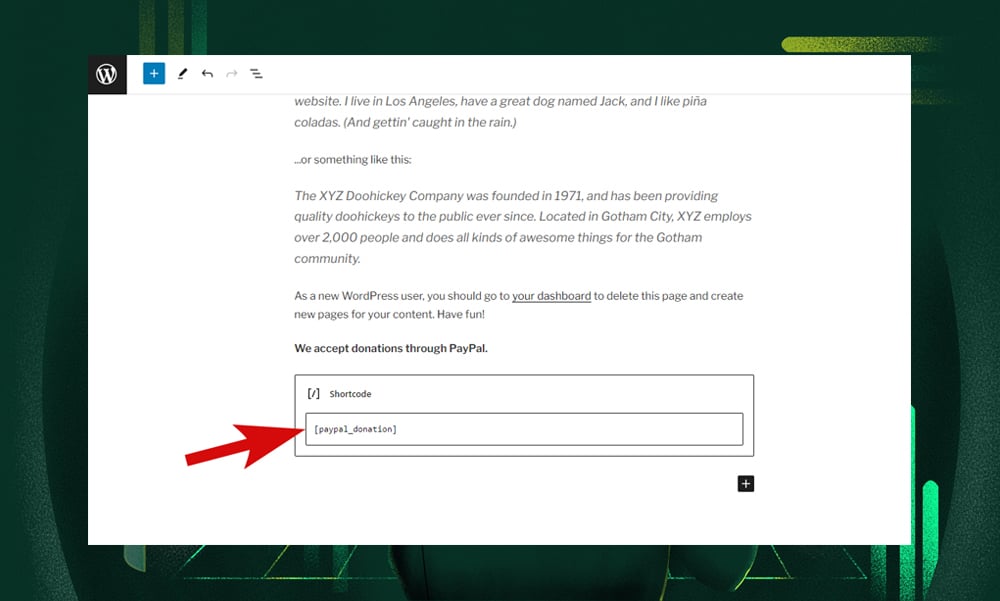
4) Add the Current Year in Blog Posts
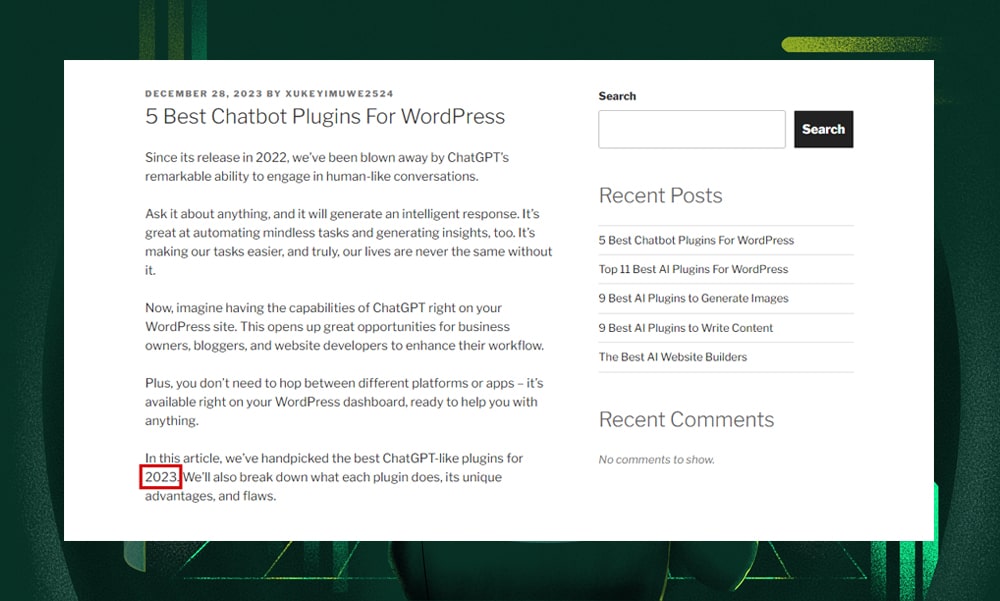
Updating the year within your content signals readers that your blog posts are current and relevant. However, doing so manually can be a tedious, often forgotten task. This is where the WordPress [current_year] shortcode snippet becomes a lifesaver.
Simply add the code at the bottom of your 'functions.php' file. Then, insert the [current_year] shortcode within your posts to dynamically display the current year. With this small change, you can easily keep your blog fresh and trustworthy.
function current_year_shortcode() {
    return date('Y');
}
add_shortcode('current_year', 'current_year_shortcode');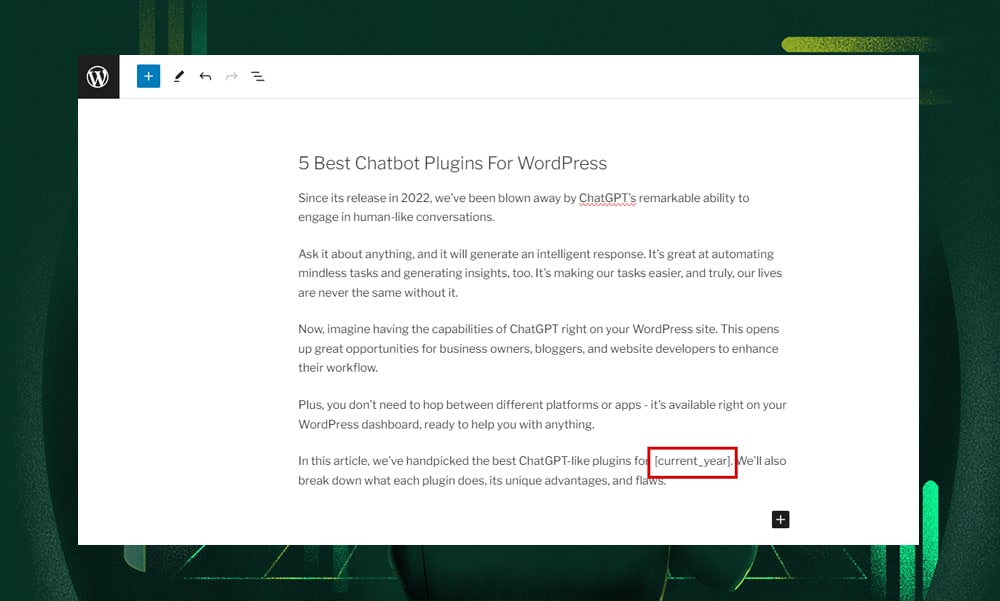
5) Replace the “Howdy” Message on the Admin Bar
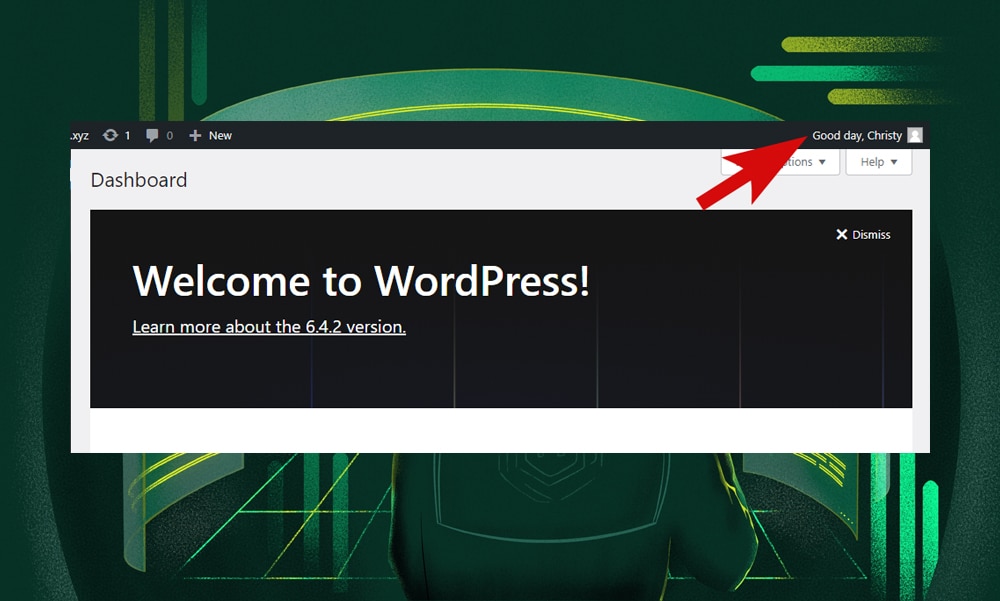
One simple way to personalize your WordPress admin page is by replacing the default "Howdy" message in the admin bar. It could be something like "Good day" or any other phrase you want. Thankfully, you don’t need a plugin for that - all you need is a simple code snippet.
The code below works by hooking into the 'admin_bar_menu' action and then fetching the 'my-account' node that contains the “Howdy” message. The 'str_replace' PHP function is used to replace "Howdy" with the custom text. Finally, the 'add_node' method of the '$wp_admin_bar' object updates the node with the new text.
add_action( 'admin_bar_menu', 'modify_admin_bar', 25 );
function modify_admin_bar( $wp_admin_bar ) {
    // get the node that has the 'my-account' id
    $my_account = $wp_admin_bar->get_node('my-account');

    // replace the 'howdy' with 'welcome'
    $new_title = str_replace( 'Howdy,', 'Good day,', $my_account->title );

    // update the node
    $wp_admin_bar->add_node( array(
        'id' => 'my-account',
        'title' => $new_title,
    ) );
}
6) Add a Custom Dashboard Logo
Want your business logo on the WordPress admin bar? Then you should try adding this code snippet.
The provided code creates a function that hooks into the 'wp_before_admin_bar_render' which is triggered before the admin bar is rendered. It then swaps out the default WordPress logo for yours and makes your backend look more professional and unique.
Once you add this to your theme's ‘functions.php’ file, don’t forget to update the image path to your logo.
function codewp_custom_logo() {
    echo "<style type='text/css'>
        #wpadminbar #wp-admin-bar-wp-logo > .ab-item .ab-icon:before {
            background-image: url('" . get_bloginfo('stylesheet_directory') . "/images/cclogo.png');
			background-size: contain;
            background-position: 0 0;
            color:rgba(0, 0, 0, 0);
        }
        #wpadminbar #wp-admin-bar-wp-logo.hover > .ab-item .ab-icon {
            background-position: 0 0;
        }
    </style>";
}
add_action('wp_before_admin_bar_render', 'codewp_custom_logo');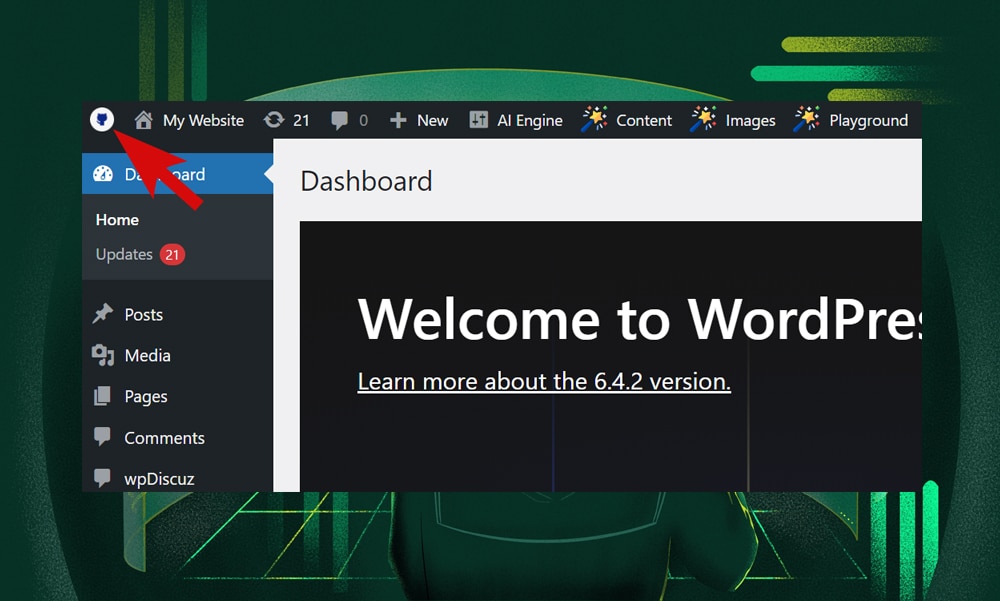
7) Add Your Own 404 Error Message
Customizing the 404 error message page on your WordPress site can transform a potentially negative experience into a positive one. It reinforces your brand identity and keeps users engaged even when they encounter a missing page.
To replace the default, intimidating 404 error page, simply paste the following code to your ‘functions.php’ file. You can add a custom message, a search bar, or even links to popular pages.
For this example, we simply changed the background and font colors of the page. Feel free to add more elements to your liking, such as custom logos and images, within the HTML tags.
function custom_404_error_message() {
    if (is_404()) {
        // Set the HTTP response status code to 404
        status_header(404);

        // Output the custom 404 error message
        echo '<!DOCTYPE html>
        <html lang="en">
        <head>
            <meta charset="UTF-8">
            <meta name="viewport" content="width=device-width, initial-scale=1.0">
            <title>404 Not Found</title>
			<style>
        		body {
            		background-color: #f2f2f2;
            		font-family: Arial, sans-serif;
        		}
        		h1 {
            		color: #ff0000;
        		}
        		p {
            		color: #333333;
        		}
    		</style>
        </head>
        <body>
            <h1>404 Not Found</h1>
            <p>Oops! This page does not exist.</p>
        </body>
        </html>';

        exit;
    }
}
add_action('template_redirect', 'custom_404_error_message');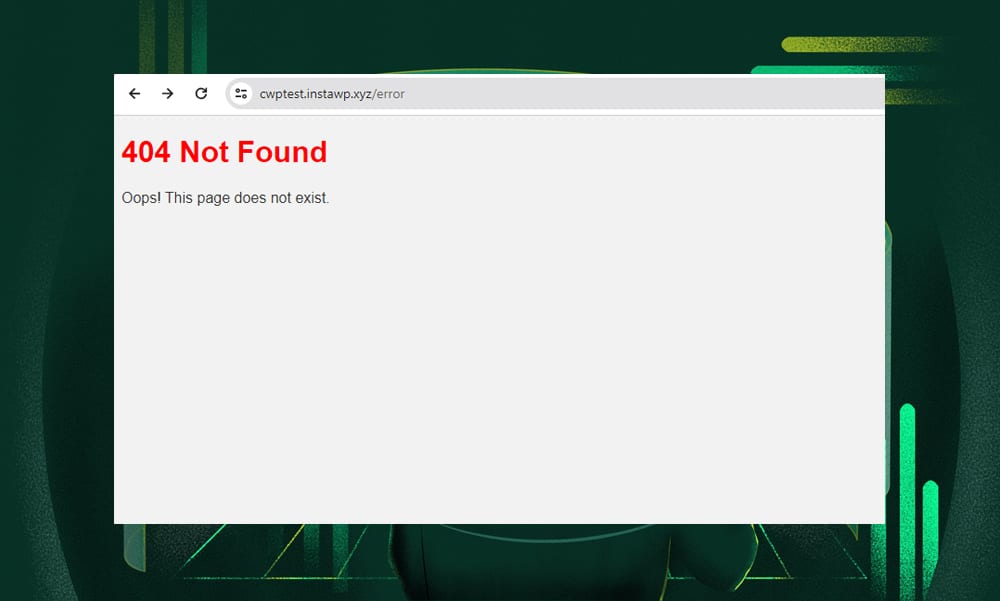
8) Limit WordPress Post Revisions
Want to speed up your website a little bit? Limiting your WordPress post revisions might help.
Fewer revisions mean less data in your database and faster loading times. The code snippet below does exactly that. Here, you can set the maximum revisions for each post in any number you want (in our example, we’ve set it to 5).
The function mainly targets 'post' types so that the other types of content are not affected. It hooks into the 'wp_revisions_to_keep' filter to manage the number of revisions. The '10' and '2' passed as arguments to add_filter function specify the priority and number of arguments the function accepts, respectively.
// Define your custom function
function limit_post_revisions($num, $post) {
    // Set a max limit for revisions for all post types
    $max_revisions = 5;

    // Check if the post type is 'post'
    if ($post->post_type == 'post') {
        return $max_revisions;
    } else {
        return $num;
    }
}

// Hook into the 'wp_revisions_to_keep' filter
add_filter('wp_revisions_to_keep', 'limit_post_revisions', 10, 2);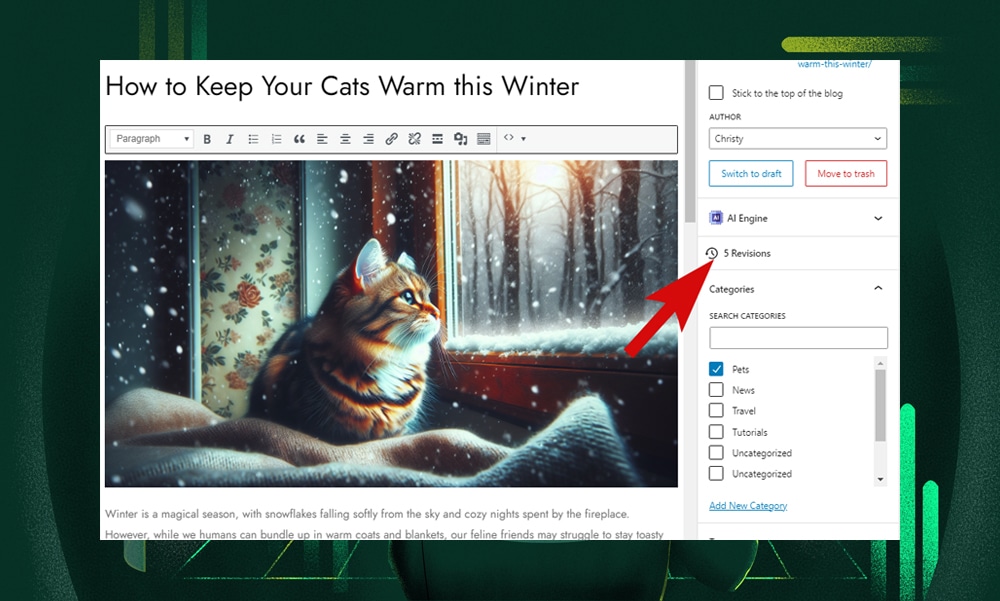
9) Display Both Publication and Modified Dates on Posts
Sometimes, you might want to display both the original published date and the last modified date on your posts. This approach is great at building trust because it lets readers know the age of the article and assures them that you’re actively updating your content.
The problem is, WordPress only shows the published date by default. Thankfully, there’s a simple code snippet that can solve this.
The code below works by first getting the global $post variable to access the current post. Then, it retrieves the dates of publication and last modification using the functions get_the_date and get_the_modified_date, respectively. These dates are then displayed in a human-readable format ('F j, Y') which corresponds to a full textual representation of a month, followed by a day of the month, and a four-digit year.
function codewp_display_dates( $content ) {
    if(get_post_type() != 'post') {
        return $content;
    }
    global $post;

    $published = get_the_date('F j, Y', $post);
    $modified = get_the_modified_date('F j, Y', $post);
    $date_string = '<p><strong>Published:</strong> ' . $published . '</p>';
    if ($modified != $published) {
        $date_string .= '<p><strong>Last Modified:</strong> ' . $modified . '</p>';
    }
    return $date_string . $content;
}
add_filter('the_content', 'codewp_display_dates');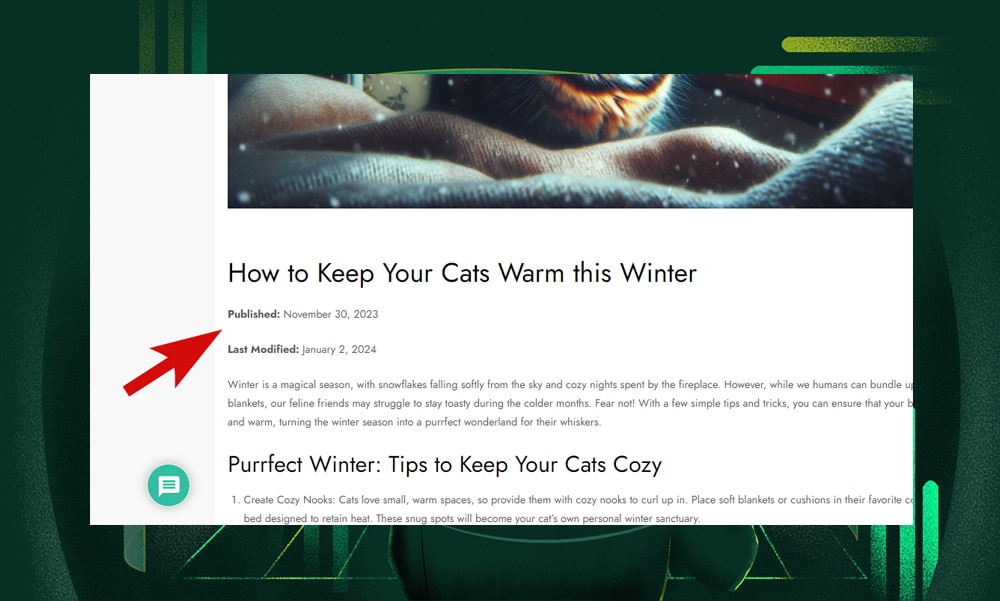
10) Set Your Website to Maintenance Mode
Maintenance pages don't have to be an annoying interruption to your visitors. Instead of the default, boring page, you can add customized messages or even attractive visuals. It’s a creative way to let visitors know you’re undergoing maintenance without creating a negative user experience.
The code snippet below works by hooking into the 'get_header' action to check if users have the necessary permissions and are logged in. If not, a maintenance message is displayed. Feel free to add background color, font style, logos, or mascots as you please within the HTML tags.
function maintenance_mode() {
    if (!current_user_can('edit_themes') || !is_user_logged_in()) {
        wp_die('<h1>Under Maintenance</h1><br />We are currently performing maintenance. Please check back soon.');
    }
}
add_action('get_header', 'maintenance_mode');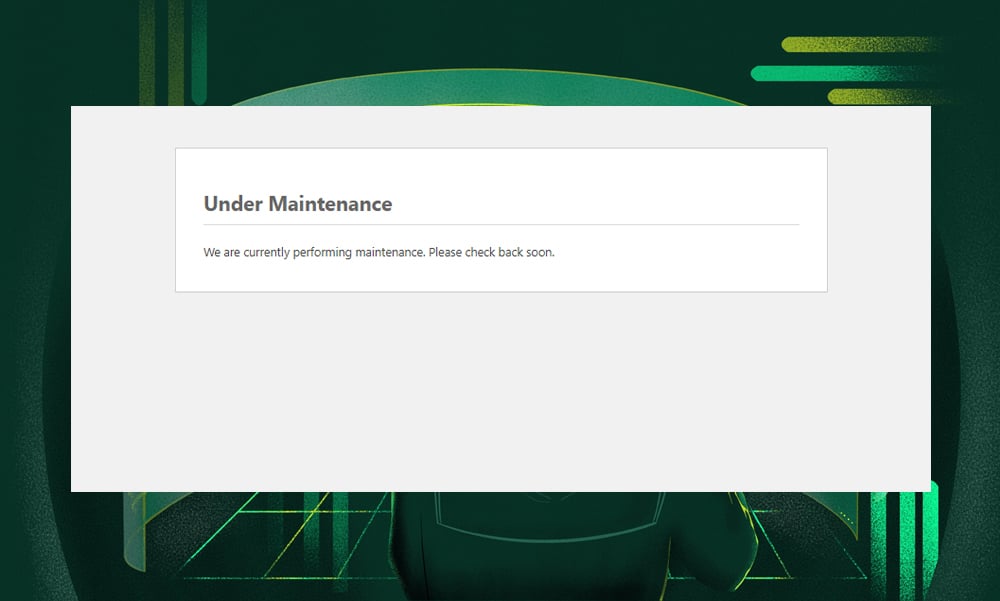
11) Customize the Footer Text in Your WP Admin
Customizing the footer text in your WordPress admin area is a subtle yet powerful way to personalize and brand your website's backend.
In this code snippet, the function codewp_change_admin_footer_text is created to output customized text in the admin footer. Through the add_filter function, this function is integrated with the 'admin_footer_text' hook in WordPress, which controls the display of footer text in the admin area.
function codewp_change_admin_footer_text() {
    echo 'We are awesome! Have a great day!';
}
add_filter('admin_footer_text', 'codewp_change_admin_footer_text');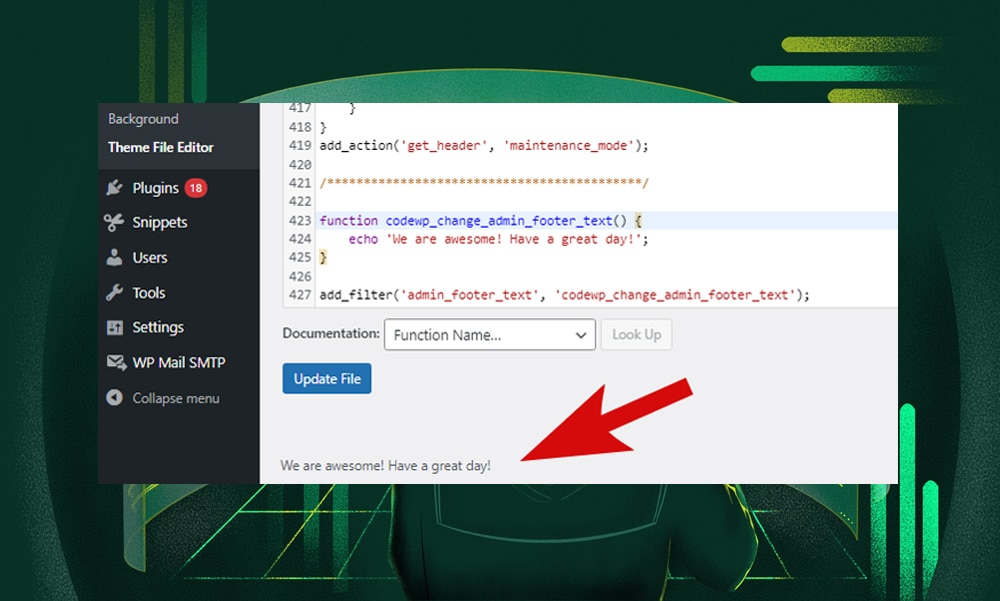
12) Automatically Update the Copyright Year on the Footer
Updating your footer’s copyright year signals visitors that your website is current and well-maintained. However, it can be a tedious task to update year after year, especially if you’re managing multiple sites.
This code snippet offers a more convenient way to auto-update the copyright year on your footer. It creates a function called add_dynamic_copyright() to get the current year and then displays a copyright message with the current year. The text also includes a placeholder for your company name (make sure to replace this with our actual business name).
function add_dynamic_copyright() {
    $current_year = date("Y");
    $background_color = "#1d2024"; // Replace with your desired background color
    $font_color = "#ffffff"; // Replace with your desired font color

    echo '<div style="background-color: ' . $background_color . '; color: ' . $font_color . '; padding: 10px;">© ' . $current_year . ' My Website. All rights reserved.</div>';
}
add_action('wp_footer', 'add_dynamic_copyright');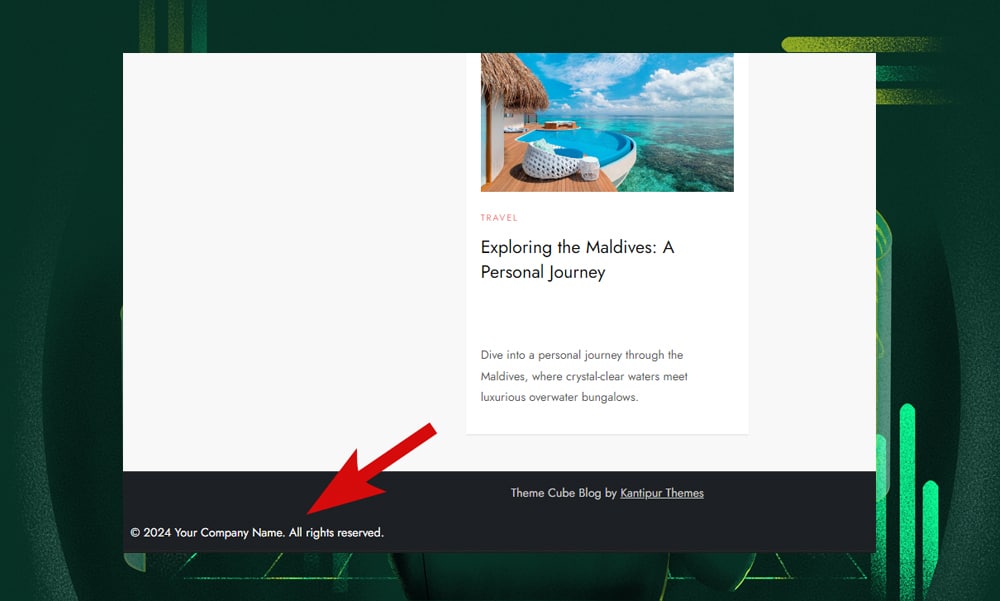
13) Hide WordPress Update Message
WordPress updates are often handled by developers or administrators who schedule and test updates to make sure they work well with the site's themes and plugins.
But if your site has multiple users with backend access, then it's a good idea to hide update messages. Doing so will prevent unauthorized users from performing the updates that might break your site.
Here’s the code snippet that will help you hide the notifications. It creates a function that checks if the current user has the 'update_core' capability. If they don't, it removes the action that displays the update notifications. The function is hooked into the 'admin_head' action, so it runs when the admin header is being generated.
function codewp_hide_update_messages() {
    if (!current_user_can('update_core')) {
        remove_action( 'admin_notices', 'update_nag', 3 );
    }
}
add_action('admin_head', 'codewp_hide_update_messages');
14) Insert Text Under Every Blog Post
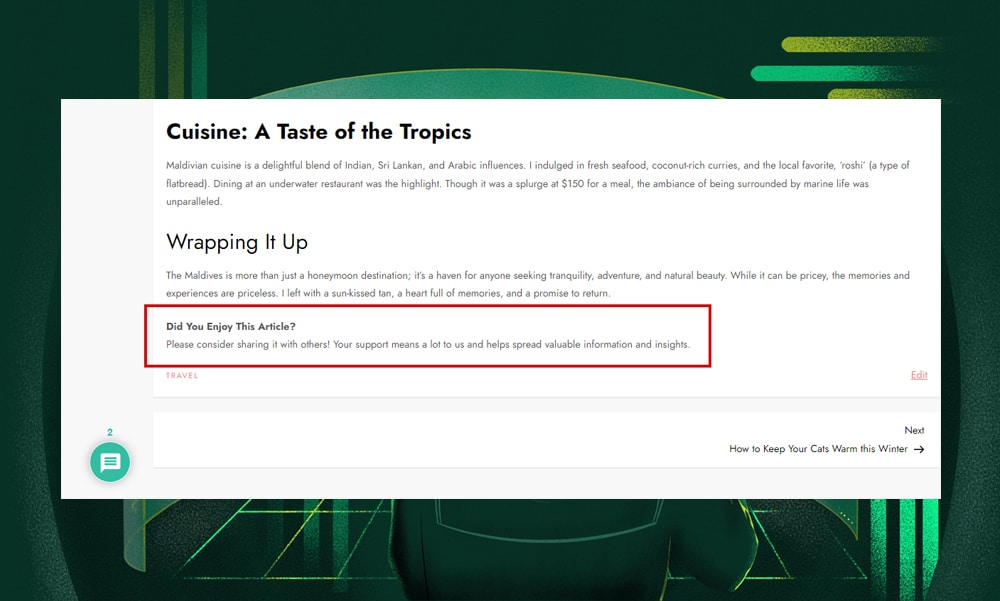
Adding text under every blog post can be a great way to add related content or products, a call-to-action, a disclaimer, or additional information to boost reader engagement. With a code snippet, you can save time as the text is automatically added to each post.
The code below defines a function add_custom_text_under_post which adds custom text under each WordPress blog post. It checks if the displayed content is a single post using is_single(). If true, it appends the predefined message to the end of the post's content.
function add_custom_text_under_post($content) {
    if(is_single()) {
        $custom_text = '<p><strong>Did You Enjoy This Article?</strong><br>Please consider sharing it with others! Your support means a lot to us and helps spread valuable information and insights.</p>';
        $content .= $custom_text;
    }
    return $content;
}
15) Create a Custom Post Type
Custom post types help you organize different content types, such as testimonials or products, and enhance user experience. You might want to consider a plugin if you’re building a complex site with multiple post types. However, if your needs are simpler, such as adding just one or two post types, a code snippet can efficiently do the job.
This code snippet lets you create a new custom post type called 'Product', which you can rename as needed. To use it, create a new PHP file in your theme's main folder, like 'product.php', and insert the code snippet there. Then, using include() or require(), include this file in your theme's 'functions.php' file.
Or, you can directly paste the code into 'functions.php'. The code works by using the 'init' action hook to register the post type after WordPress loads but before the page starts loading.
function codewp_create_post_type() {
  register_post_type( 'Product',
    array(
      'labels' => array(
        'name' => __( 'Products' ),
        'singular_name' => __( 'Product' )
      ),
      'public' => true,
      'has_archive' => true,
    )
  );
}
add_action( 'init', 'codewp_create_post_type' );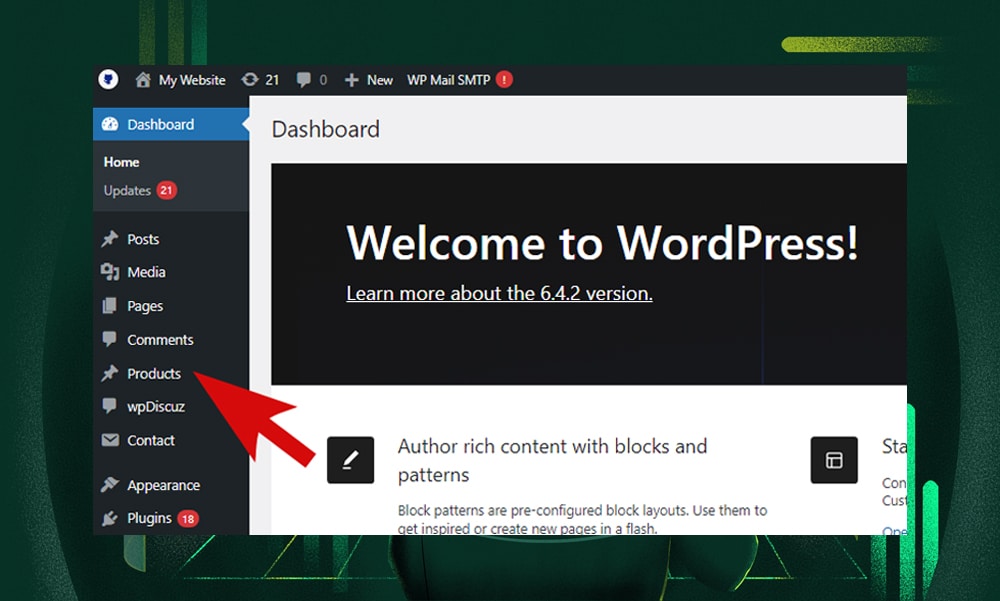
How to Add Code Snippets to Your WordPress Site
Adding code snippets to WordPress is fairly easy, and there are two ways to do this. First, you can add them manually to your theme’s files. Second, you can use a code snippet plugin.
Here’s how you can proceed with each option:
Option 1 - Add Code Snippets Manually to Your Theme’s Files
This is the best option for developers who prefer greater control over their site and wish to avoid additional plugins.
However, this will require a deeper understanding of WordPress’s inner workings and a good grasp of coding principles. If you’re comfortable with coding languages like PHP and JavaScript, then this might be the best approach.
To add code snippets, you’ll need access to your theme's files via an FTP client or File Manager in your hosting control panel. Common files to add snippets are functions.php, header.php, or footer.php, depending on what the code does. All of these can be found within the wp-content/themes/your-theme-folder/ directory.
Make sure to paste your code snippet into the appropriate file. Be careful with the placement – it should typically go at the end of the file. Save your changes and upload the file back if you're using FTP.
Option 2 - Use a Code Snippet Plugin
If you’re not comfortable with coding or tweaking your theme’s file systems, then a code snippet plugin might just do the trick.
One of our favorites is Code Snippets by Code Snippets Pro. With this plugin, you can neatly categorize and manage your code snippets to keep track of various customizations. Another plus is that it reduces the risk of errors since you won’t need to touch your site’s core files.
However, for advanced users, this method might feel a bit restrictive. You might also need to update your plugin occasionally to ensure that it runs smoothly with the WordPress version you’re using.
There You Have It!
Adding code snippets is a powerful way to customize your WordPress website - from blocking spam messages to creating custom post types. Throughout this article, we’ve mentioned 15 simple yet useful ones.
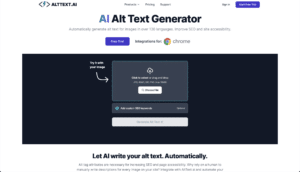
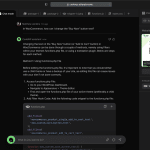
If you want to add more personalized features to your site, you might want to check out CodeWP. This AI-driven tool is great for generating your own code snippets, especially if you’re adding custom features that aren’t available through standard themes or plugins.
Give it a try and see how well it can work for your website!